Introduction to the ELEGOO Mega 2560 Project Kit
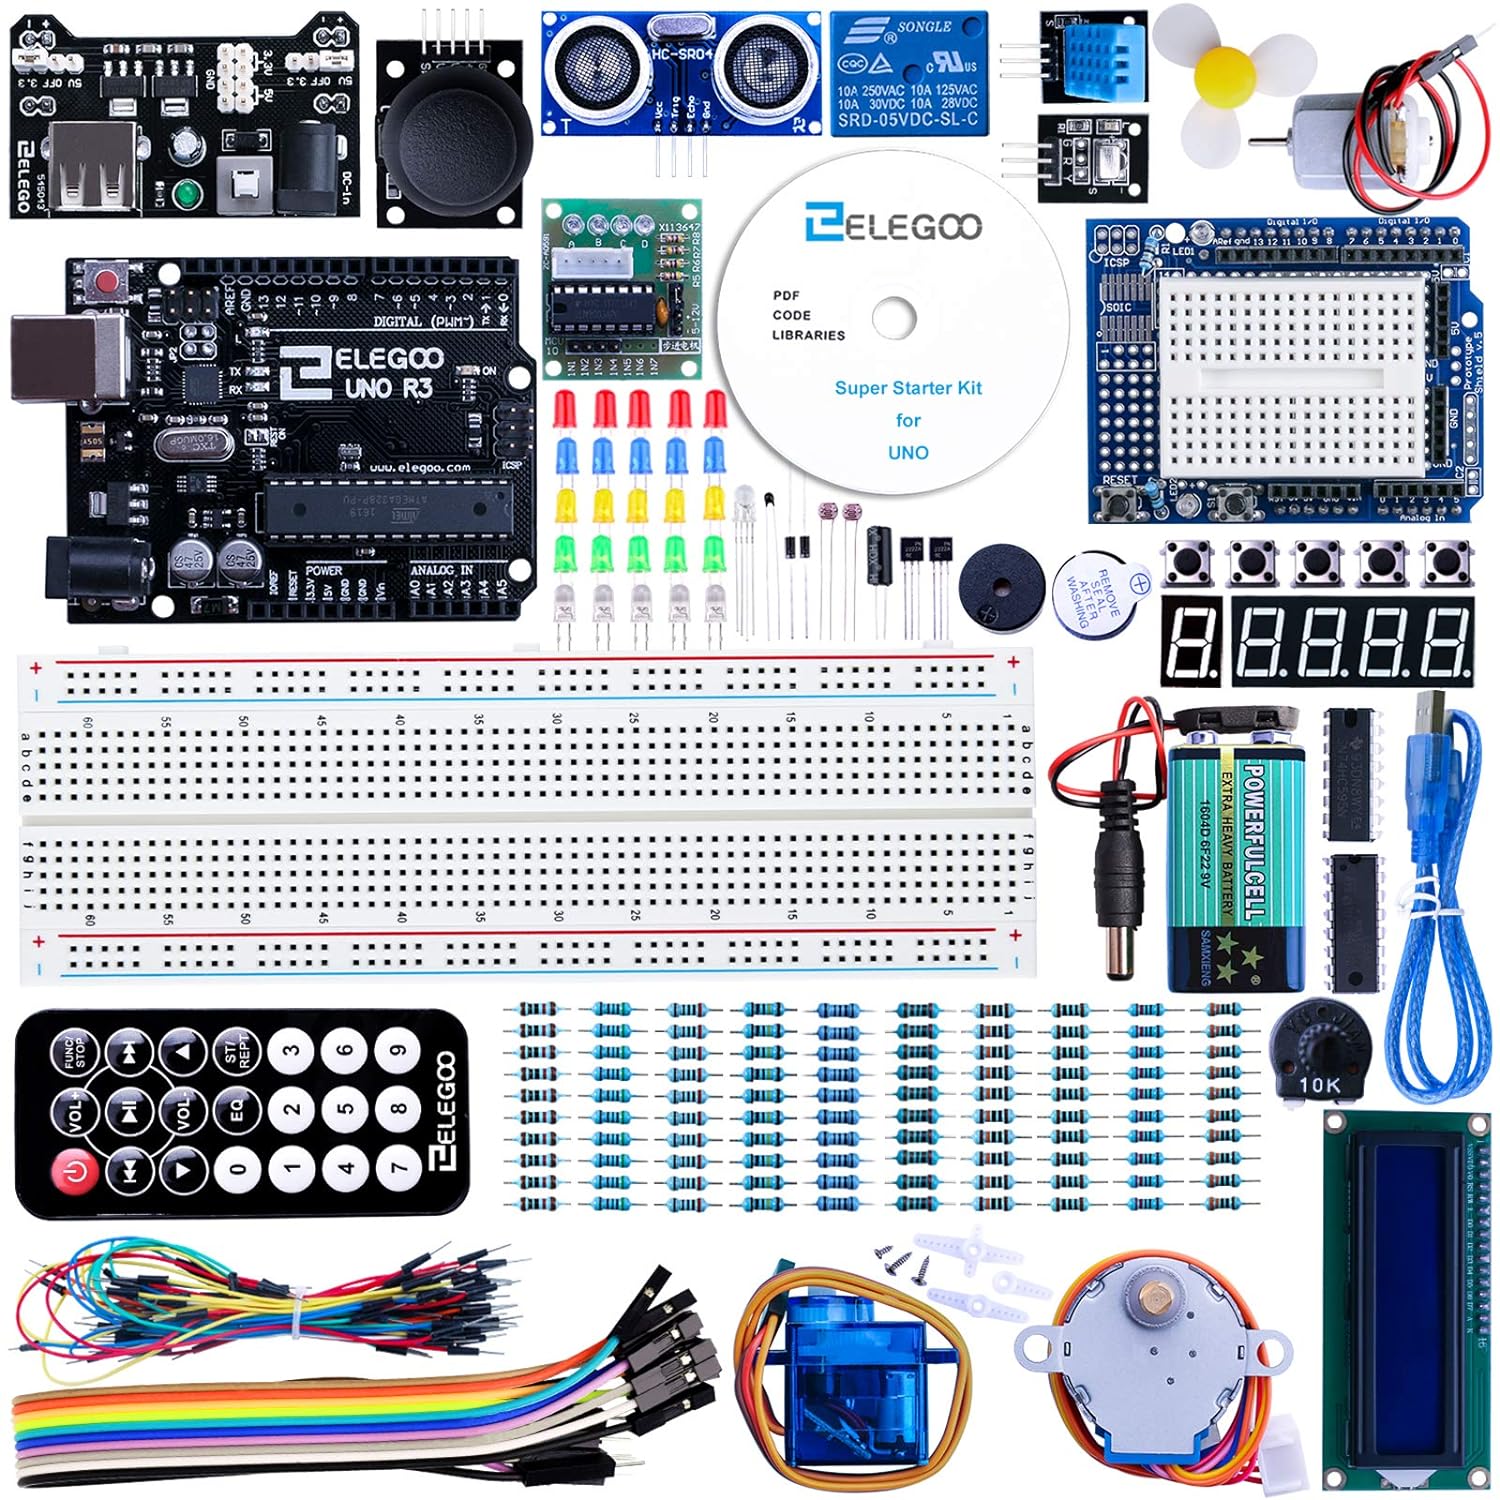
The ELEGOO Mega 2560 Project Kit is one of the best choices for both beginners and seasoned electronics enthusiasts. Whether you’re diving into your first Arduino-based project or pushing the boundaries of your programming skills, this kit is designed to provide a rich and hands-on learning experience. Equipped with over 200 components, the kit enables users to explore a wide range of projects with ease. Let’s delve deeper into what makes the ELEGOO Mega 2560 stand out in the electronics world.
Key Features of the ELEGOO Mega 2560 Project Kit
1. Versatile Mega 2560 Board
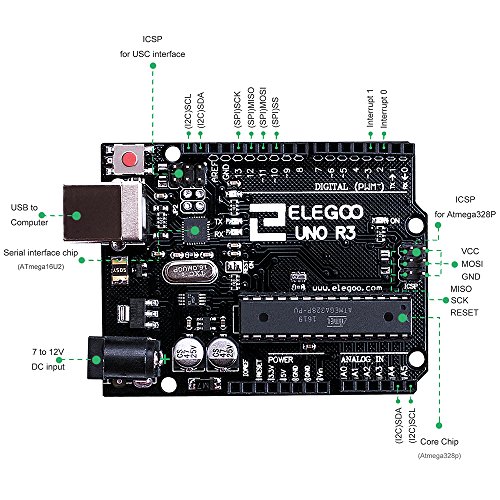
At the heart of this project kit lies the Mega 2560 board, a microcontroller based on the ATmega2560 chip. Unlike its smaller counterparts, the Mega 2560 offers a robust 54 digital input/output pins, making it ideal for more complex projects.
- Memory: With 256 KB of Flash memory, this board can store large sketches.
- Connectivity: USB Type-B connector ensures simple and fast uploads of code.
- Compatibility: The board supports various sensors and modules, expanding its usability across a variety of electronics projects.

2. Extensive Range of Sensors and Modules
The kit includes sensors, modules, and other electronics components that allow you to explore a wide range of real-world applications.
- Temperature and Humidity Sensor: Perfect for weather stations or environmental monitoring projects.
- Ultrasonic Sensor: Frequently used in robotics for obstacle detection.
- Infrared Remote Control Module: Can be used for wireless control of your projects.
- Servo Motors and Stepper Motors: Essential for robotics, enabling precise motion control.
3. Comprehensive Project Tutorials
For beginners, ELEGOO provides detailed tutorials that cover over 30 projects. These guides offer step-by-step instructions, code examples, and wiring diagrams to ensure you succeed in building your projects.
- Code Examples: Pre-written code that can be easily modified.
- Wiring Diagrams: Simplifies the process of connecting components.
- Project Ideas: From basic LED blinkers to advanced sensor-based projects, these tutorials are designed to grow your understanding.
Getting Started with Your First Arduino Project
Project 1: Blinking LED
One of the simplest yet foundational projects is controlling an LED. Learning how to control an LED using a microcontroller introduces you to digital input/output pin configuration, coding basics, and fundamental circuit design.
Steps to Complete the Blinking LED Project:
- Wiring: Connect the positive terminal of the LED to pin 13 on the Mega 2560 and the negative terminal to GND.
- Code:
cpp
void setup() {

pinMode(13, OUTPUT);

}

void loop() {

digitalWrite(13, HIGH);

delay(1000);

digitalWrite(13, LOW);

delay(1000);

}
- Upload: Upload the code using the Arduino IDE.
- Observe: The LED will blink on and off in 1-second intervals.
Diagram:
mermaid
graph TD;

PowerSource --> Resistor --> LED --> GND;

Pin13 --> LED;
Advanced Arduino Projects with the ELEGOO Mega 2560 Kit

Project 2: Ultrasonic Distance Measurement
This project uses the included ultrasonic sensor to measure distances, providing hands-on experience with sensor integration.
Steps to Build an Ultrasonic Distance Measurement Project:
- Components Needed:
- Ultrasonic sensor (HC-SR04)
- Jumper wires
- Breadboard
- Arduino Mega 2560
- Wiring:
- Connect the VCC pin of the ultrasonic sensor to the 5V pin on the board.
- Connect the Trig pin to digital pin 9 and the Echo pin to digital pin 10.
- Connect GND to GND.
- Results: You’ll see the measured distance printed in the Serial Monitor in centimeters.
Comparison of ELEGOO Mega 2560 vs. Competitors

1. ELEGOO Mega 2560 vs. Arduino Uno
While the Arduino Uno is great for simpler projects, the Mega 2560 offers significantly more I/O pins and memory, allowing for more complex projects that require multiple sensors, motors, and outputs.
- Pin Count: Mega 2560 has 54 digital pins compared to the Uno’s 14.
- Memory: Mega 2560 offers 256 KB flash memory, whereas the Uno only has 32 KB.
- Use Cases: Mega 2560 is ideal for robotics, IoT, and automation systems.
2. ELEGOO Mega 2560 vs. Raspberry Pi
The Raspberry Pi is more suited for projects requiring advanced processing, such as running a full operating system, while the ELEGOO Mega 2560 is a more affordable and easier option for controlling sensors and motors.
- Processing Power: The Raspberry Pi features a full ARM processor, capable of multitasking, while the Mega 2560 is a simple microcontroller designed for more direct hardware control.
- Ease of Use: The Mega 2560’s simplicity and vast tutorial support make it easier for beginners.
- Price: The ELEGOO Mega 2560 kit is more affordable, particularly when factoring in the number of components included in the kit.
Final Thoughts: Why Choose the ELEGOO Mega 2560 Project Kit?
The ELEGOO Mega 2560 Project Kit is the ideal choice for anyone looking to dive into the world of Arduino-based electronics projects. Its comprehensive set of components, high-quality tutorials, and affordable price make it a highly recommended product for both hobbyists and learners. Whether you’re building your first LED project or tackling complex robotics, this kit offers everything you need to get started.


Clochant Great information shared.. really enjoyed reading this post thank you author for sharing this post .. appreciated